Cost Estimator
Actualmente, el idioma de la aplicación no se puede cambiar. Sin embargo, pueden crear sus estimados en otros idiomas ingresando algo como “Escribe el estimado en español” en el campo de descripción del proyecto, y la aplicación generará todo el estimado en español.
While the app’s language cannot be changed right now, you can create your estimates in other languages by inputting something like, “Write estimate in Spanish” in the project description field and it will create the whole estimate in Spanish.
Don’t worry — your estimates are likely still saved to your account! You may just need to manually refresh the app to sync your data. Here’s how:
1. Tap the three horizontal bars (☰) icon at the top left of your SimplyWise home screen
2. This will open the side menu
3. Tap the small circle (refresh) icon
4. Wait a few seconds for your estimates to sync
If your estimates still don’t appear after refreshing, please reach out to our support team at support@simplywise.com and we’ll be happy to help.
Yes, you can access your SimplyWise Cost Estimator account across multiple devices. The app is available on Android/iOS smartphones, iPad and tablets, and web browsers.
To access your account on a computer, please visit www.simplywise.com and select “Cost Estimator” from the options, then login.
Please note that while multi-device access is supported, the web version currently has limited functionality compared to our mobile and tablet apps, which offer the full range of features and optimal user experience!
Yes — you can share your account with staff by giving them your login credentials. They will need to download the app and sign in with your phone number and password.
Please note that they will have full access to your account with no way to restrict what they can see or do. You can also use the same login across multiple devices.
Yes, you can use the app across multiple mobile and tablet devices – simply download the app on each device and use the same login credentials to access your account. All your estimates should be synced and accessible from any device.
However, please note that while estimates are synced across all devices, some features do not sync across devices, such as stored pricing preferences, markup settings, and business information. These will need to be set up individually on each device.
Currently, there isn’t a way to adjust the mobile app size for any of the devices. If using the mobile phone isn’t ideal, you’re welcome to use the web version from your tablet (or computer) at www.simplywise.com/login and then clicking on the Cost Estimator side.
It may be helpful to know that the web version currently only allows access to create and edit estimates. For full feature access, you’ll want to hop back into the mobile app!
Be sure to check out our video library filled with quick tutorials that walk through the app’s features.
📌 Link here: https://www.youtube.com/@simplywise-estimates/videos
During onboarding, we ask whether you’re a contractor, handyman, homeowner, landlord, or other to better understand who uses our app. This selection is just for internal research—it doesn’t affect your app experience or features. There’s no need to change it, and there’s currently no option to do so. You’re good to keep using the app normally, no matter which role you selected!
To protect your safety, we don’t have access to your original password for security reasons. To reset your password, simply log out of the app, then enter your phone number on the login page, and tap “Reset here” on the password page.
While you can’t add another user to the account, you’re welcome to share your account with someone else. To do this, they will need to download the app on their phone and use your phone number and password to log into your account. Please keep in mind that they will have full access to your account and there isn’t a way to limit their access to anything.
Your Cost Estimator account is linked to the phone number you used to sign up, not an email address — so there’s no login email to change.
If you want to change the email address estimates and invoices are sent from, you can update that separately:
- Open an estimate and tap the three dots in the upper right
- Select Send Estimate
- Tap the From field to update your sending email address
To update your business contact email that appears on estimates:
- Go to Menu > Settings > Business Info
- Update the email field there
If you’re having trouble accessing your account due to a phone number change, please contact support at support@simplywise.com.
While the app doesn’t take measurements, you can include those details in the “Describe Project” field. The more detailed this is, the more accurate your estimate will be. Additionally, you can upload photos and blueprints using the icons below the “Describe Project” field.
You can absolutely include your set of plans in your estimate!
To get started, you’ll want to tap the blue circle button on the lower right on your Home screen and tap Estimate.
From there, you’ll be taken to the Project Description page and see a series of small icons under the box where you’d input your project details. The first icon is to add photos, the second icon will allow you to upload the prints/floor plans.
Tap “Add Blueprint from File” to get those added to your estimate.
You’ll want to be as detailed as possible and include all measurements in your project description. The more detailed this is, the better and more accurate your estimate will be.
To add your business log, you’ll want to tap Menu>Business Info and upload from there
Follow along in our video tutorial below!
Currently, there is no way for you (the contractor) to sign the estimate within the app. The signature feature is available only to your client or customer, who can sign the estimate to indicate it has been approved.
Currently, the domain in the shared links cannot be customized and will show the SimplyWise branding.
We’re exploring how to enhance this, and hope to have more customization available in the future!
Yes! You can upload insurance claim reports, Xactimate files, and other supporting documents in a few different ways:
Option 1: Attach documents directly to the estimate
- Save your estimate.
- Open the saved estimate.
- Tap Send.
- Upload your documents under Site Photos.
- Note: you may need to upload page by page, so it may not be the most efficient for large docs and better for one page docs
Option 2: Upload through the Photos section
- Save your estimate.
- Open the saved estimate.
- Tap Photos at the top of the screen.
- Upload your reports, files, or supporting documentation.
- Note: you may need to upload page by page, so it may not be the most efficient for large docs and better for one page docs
Option 3: Send through your email app (recommended for larger files)
- Open the saved estimate.
- Tap Send.
- Select Other Sharing Options instead of Email.
- Choose your preferred email app.
- Attach your insurance reports, Xactimate files, and any other supporting documents before sending.
For larger reports and file attachments, using Other Sharing Options and sending through your email app is often the most efficient method.
You can add this by using the following steps:
- Tap into the saved estimates
- Navigate to where the line items are located
- Tap +Item on the far right
- Rename item from mark up to tax
- Tap percentage
- Enter the exact percentage
- Tap Save
Adding multiple locations for the same client only takes a few taps.
To get started, tap Clients icon on the lower right and then tap +New Client
Here you can tap Import from Contacts to import directly from your phone or manually input as well.
To enter manually, complete all the fields on the screen, and be sure to add identifying information on the first field labeled Name so you know which location you’re selecting from the drop down menu later when assigning an estimate or invoice.
For example, you can label a client like this:
- Johnson Properties – 123 Main St.
- Johnson Properties – Garage at 445 Elm St.
- Johnson Properties – Office at 854 Holly St.
Follow along in our tutorial below to see steps in action!
The best to include this information is to ensure you’ve added your client’s info into the app. You can do this by using these steps:
- Tap Clients on the bottom tray on the home screen
- Tap the blue + New Client button on the lower right
- Enter Client details, including address
- Tap Save once completed
Once saved in the app, you’ll be able to select the Client and their corresponding information from the Client Drop-Down menu
To send your client form link to your prospective clients, you’ll want to tap the menu (three horizontal lines icon in the upper left corner of your Home screen), and then on the Client Intake Forms heading. Copy the link from there!
Join us in the tutorial below to learn more about how to use the Client Intake Forms to gather details about your clients’ project needs!
The Client Intake Form is a unique URL you can share with your clients when they are interested in doing a project with you. The short form asks clients for details about their desired project, and asks them to provide any photos of the site if they have them. Completed forms instantly appear in the “Inbox” in your app. The Inbox is in the upper righthand corner of the homescreen. When a client submits a form, their information will appear there, as well as an option to instantly “Create Estimate” off of the information they provided. To send the form to a customer, tap the menu on the upper left, then Client Intake Forms. You will be able to preview the form before you send it. You can then send this URL directly to customers, and even add it to your website.

There are two common reasons why client intake forms might not appear in your inbox:
1. If you manage multiple accounts, verify you’ve shared the correct intake form link. Each account has a unique form link, and forms must be submitted through your specific account’s link to route properly.
2. Forms may not appear if clients skip required sections. Specifically, if clients don’t complete the construction-related prompt that generates questions, or if they submit a form with no answers in the Q&A section, these are considered incomplete and won’t show in your inbox. Please confirm your clients have completed all required sections.
If you are still running into any issues, connect with us here: https://www.simplywise.com/support
Currently, only one Client Intake Form link per account is supported. You can customize this link and share it on your website. If you need additional links, you will need a separate account with a different phone number and subscription.
Use a QR code generator like [https://www.qr-code-generator.com](https://www.qr-code-generator.com) to create a QR code for your client intake form.
Not yet — a built-in contracts feature is something we are actively working on as we continue to expand the app.
In the meantime, here are two free options that work well:
- Signaturely (signaturely.com) — free downloadable Word and PDF contracts that are easy to customize
- Jotform (jotform.com) — templates with e-signature capabilities
Deleted estimates cannot be recovered. We recommend creating a folder called “Archive” for estimates you might want to reference later, rather than permanently deleting them. You can add a new folder by tapping the pencil icon on the homescreen and following the prompts.
Yes, you can upload multiple pictures. When generating a new estimate, you can include a maximum of 4 images.
Once the estimate is saved, you can add more photos (and render them!) by tapping into the saved estimate, and then tapping on the photos icon at the top.
Also, when sharing your estimate, you’ll be able to attach more images to the shared estimate.
Currently, the app doesn’t support creating estimates from video, but we hope to offer this soon!
In the meantime, you have several options:
- Photos — Take photos during the estimate creation process
- Image Renders — Add photos and render them to show clients what to expect
- Room Scan — Use LiDAR to capture measurements (iOS Pro devices)
- Blueprints/Plans — Upload existing blueprints or floor plans
- Voice-to-Text — Describe the project using your voice
We’re working on adding video support in the near future! 😊
📌 Need more help? Check out our video tutorial library for step-by-step walkthroughs!
To generate the labor by the square foot, you can enter those details into the Project Description field when inputting all of the details for your estimate.
Alternatively, you can manually calculate the labor based on your measurements and add that as a line item. To add a line item, tap +Item to add the labor charge.
1. Tap the blue “+” button on the bottom of the homescreen, and then tap Estimate from the pop up menu.
2. Enter your project details on the description page. For maximum accuracy, be as specific as possible and include any relevant measurements that you have. (Note that the app can not automatically “read” measurements from a photo. For now, you have to manually input all measurements.)
3. Optionally add photos or blueprints if desired.
4. Once completed, tap the arrow button in the upper right-hand corner.
5. Answer any clarifying questions.
6. Review the draft estimate and tap to edit any material, labor or fee items. (The app will learn from your edits.)
7. Save to your preferred folder category (we recommend creating folders by project or client).
8. Share with your client via email or other sharing options.
Currently, the template feature is only available on iOS devices (but should be available on Android devices soon!).
To get started, you’ll want to use these steps:
- Tap the blue Create+ button on the home screen
- Tap Estimate from the pop up menu
- Tap On-Site Walk Through or Manual Entry
- Follow the prompts to input the scope of work
- Answer all of the questions that the app asks to gather more details for the project
- One the estimate is generated, tap through the prompts to save it to your folder
- When prompted to Save as Template, tap the blue button
- Name the template
- Tap Done
We also have a video library filled with quick tutorials that walk through the app’s features. 📌 Link here
When you generate a new estimate again, you should see a pop-up asking if you want to continue with (or delete) your previous draft. Simply tap “Continue” and you’ll be able to resume working on your last estimate. The app automatically saves your progress so you can pick up where you left off.
You can input the hourly rate in the project description field when inputting your scope of work, or you can tap into each line item and make adjustments there.
Be sure to check out our video library filled with quick tutorials that walk through the app’s features
📌 Link here: https://www.youtube.com/@simplywise-estimates/videos
The app is designed for various projects, from small homeowner DIY jobs to large commercial construction projects. It also supports estimating for low voltage installations, cleaning, landscaping, and hardscaping projects.
Many of our customers tell us they use the app for projects even beyond the app’s intended purposes, e.g. autobody work. We recommend trying any kind of project with the app to see how it works for you!
This rating of your project description is based on how much detail you have provided. Including more information in the project description (including adding any photos/blueprints you may have) will improve the accuracy of your estimate. However, you can ‘submit’ a project description even if the app rates it as “Poor” but may not get the best estimate. The key to a solid estimate is a detailed and thorough project description.
Our estimates are based on real market data tailored to your region. We use national construction pricing databases and adjust for regional cost differences automatically.
To get the most accurate estimates:
– Be specific in your project description: include project type, materials, and location (city or zip code).
– Add your business location in “Business Info” in the menu
– Edit any line items manually after generating the estimate, and the app will learn from your edits.
This ensures the estimate reflects your actual cost and scope of work.
Keywords: where do your prices come from; where do you get your data; how are prices calculated
Our app generates initial cost estimates based on general market data for your area. You can improve accuracy by entering your business location in the menu under “Business Info”.
You can also adjust any prices that don’t match your expectations by tapping into an items and directly adjusting the quantity or price.
The app learns from your edits, so estimates will improve over time.
If you’re having trouble creating new estimates, please confirm the following:
1. You are on a stable internet connection
2. Your trial period is active
3. Your subscription is current
If you do have stable internet, and your subscription is in fact active but you still can’t create a new estimate, let us know – there could be a bug for us to look into.
If you’re having trouble saving estimates, please check your internet connection: A stable connection is required to save estimates.
To generate an invoice from an existing estimate:
1. Navigate to the estimate you wish to convert into an invoice.
2. Tap the three dots (menu icon) in the top right corner.
3. Select “Create Invoice” from the menu that appears.
After selecting “Create Invoice,” you’ll be prompted to fill out additional fields to complete your invoice. You can then preview the invoice before sending it to your client.
To add a discount, you can use these steps:
- Navigate to the folder where the estimate is saved
- Tap into the estimate where you can view the line items
- Tap on any +Item on the far right to add a line item
- Give the line item a name such as Veteran Discount
- Set the unit to a negative number such as 1
- Enter the price such as $100
- Tap Save
- This adds the discount rate to the estimate as a line item
Quickly download an estimate for your records using these steps and tutorial below.
- If the estimate is already saved, tap into the folder where it’s located and tap on the three dots on the upper right corner.
- Tap Send Estimate
- Tap Preview
- On the Preview & Send screen, tap the download arrow on the upper right corner
- This will download it right to your device for easy access or to send directly from your device
To view the history of an estimate, you can tap into the estimate details screen and then tap on the History icon on the upper right.
Please note, this is a view only feature at this time.
To edit your estimate, tap into the folder where you’ve saved it and tap into the estimate – you should see the line items and multiple tabs at the top of the screen.
You can make changes to individual line items or by tapping the Edit with AI button.
Be sure to check out our video tutorial below and follow along in your app.
To view your project breakdown, tap into the folder where it’s been saved to view the Estimate Details screen. From this screen, you’ll want to tap on the Project Breakdown field and make your desired changes there.
The estimate date is automatically generated when the estimate is created and cannot be changed on existing shared estimates. To get a new date, you’ll need to generate a new estimate – the new estimate will have today’s date.
We’re currently working on adding the ability to update estimate dates on existing shared estimates. Stay tuned for this enhancement in upcoming versions!
Alternatively, as a temporary workaround, you can use software like Adobe to edit the estimate PDF directly after downloading it.
To update the estimate status, you can use these steps:
- Tap into the folder where the estimate is located
- Tap into the estimate so you can see the details (line items)
- Tap the three dots on the upper right corner
- Tap Update Status from the drop down menu
- Scroll the wheel to make your selection
- Tap Done
No worries! You can change an estimate status with a few taps.
To do this, you can use these steps:
- Tap into the folder where the estimate is located
- Tap on the estimate to view the details (line items)
- Tap the three dots on the upper right hand corner
- Tap Update Status
- Scroll the wheel to change the status
- Tap Done
We also have a video library filled with quick tutorials that walk through the app’s features – 📌 Link here: https://www.youtube.com/@simplywise-estimates/videos
Yes, you can edit a saved estimate with A.I. To do this, navigate to the folder where your estimate is saved, open the estimate, and tap the “Edit with A.I.” button. This will allow you to make further modifications using our A.I. assistance features.
Please note, the Edit with AI button doesn’t work for taxes, markup, and fees, but you can add those manually.
To edit an estimate number, you can use these steps and follow along in our quick tutorial below.
- Tap into the folder where the saved estimate is located
- Tap the three dots on the upper right corner
- Tap Send Estimate
- On the Send Estimate screen, you can tap into the Estimate Number field to make changes
Adding, editing, and deleting folders helps keeps projects organized and is a completely customizable process!
To get started, tap on Projects on the lower right corner and then tap the pencil icon to enter edit mode and then tap Add Folder to get started. To edit, tap on an existing folder to make changes. And, to delete, tap on the folder you would like to delete and then tap the red trash can icon.
Be sure to tap the X on the upper right corner when completed to exit edit mode.
Also, please note you’ll need to have at least one folder ready before you create an estimate or you won’t be able to save it!
See the tutorial below and follow along to quickly create your custom folders.
Changing folders where an estimate is saved can be completed with a few taps.
To get started, you’ll want to use these steps and follow along in the tutorial below:
- Tap Projects tab on the lower right corner
- Tap into the folder where the estimate is saved
- Tap the three dots on the upper right corner
- On the pop up menu, tap Change Folder
- You will see your space with your folders pop up
- The folder(s) with a blue check mark indicate where it’s currently saved
- To remove it from the existing folder, tap on it to remove the blue check mark
- Tap the new folder(s) where you would like to save it
- Tap Save
If you do not currently have any new folders created and need help, please watch the second tutorial included below to walk through how to create more custom folders.
Currently, the estimate feature does not include a built-in down payment or deposit requirement option. However, you can still include deposit details by adding them in the Message, Notes, or Disclaimer fields before sending the estimate.
You can access these fields on the Preview Estimate screen before sending your estimate to the client.
How do I create an invoice with a payment schedule?
To create a quick invoice from scratch:
- Open the app from the home screen
- Tap the blue + button in the lower right corner
- Select Invoice from the pop-up menu
- Tap From Scratch
- Enter invoice details such as date, invoice number, client information, etc.
- Tap the + under Items to add invoice items
- Tap Add Field to include a Payment Schedule
- Tap the + under Payment Methods to add payment options
- Tap Next when ready
- Select the folder where you would like to save the invoice
- Tap Continue
- On the Preview Invoice screen, tap Edit to make changes or Send Invoice to send it
How do I create an invoice from a saved estimate?
- Navigate to the folder where the estimate is saved
- Tap the three dots in the upper right corner
- Select Create Invoice
- On the Invoice Customization screen, choose either:
- All Line Items, or
- Summary
- Tap Next
- Confirm all invoice details are correct, including:
- Issue date
- Due date
- Invoice number
- Client information
- Make sure a Client is selected
- Tap Add Field to add:
- Payment schedules
- Photos
- Attachments
- Additional fields
- To include payment methods, tap Add Payment Method
- Tap Next
- If the button is gray, a required field is missing. Look for any fields marked in red.
- Tap Send Invoice to send or Edit to make additional changes
How do I add a payment schedule to an invoice?
- Open the invoice
- Tap Edit
- Tap Add Payment Schedule
- Enter the payment type/details
- Tap Add Payment Schedule again to add additional payments if needed
- Tap Back
- Tap Update
- Send the updated invoice from there
How do I send an invoice?
- Open the folder where the estimate is saved
- Tap the three dots in the upper right corner of the estimate
- Select Create Invoice
- Add invoice details such as:
- Issue date
- Due date
- Invoice number
- Client information
- Add any deposit or payment method details
- Tap Next
- Select a folder where you would like to save the invoice
- Tap Continue
- Tap Send
How do I apply payments to an invoice?
- Open the folder where the invoice is saved
- Tap the invoice
- Tap Payments at the top
- Tap Record Payment and enter payment details
- Tap Save
- Tap Send to send the updated invoice showing applied payment(s)
To add your business license information, you can use the following steps:
- Tap Menu on the upper left corner (three horizontal lines)
- Tap Business Info
- Scroll down to the bottom
- Add number to the business license number field
How to Include notes in the invoice:
- Tap into the folder where the invoice is saved
- Tap on the invoice
- Tap Edit
- On the Update Invoice screen, tap +Add Field
- Tap Notes and this will add the field to the screen
- Tap +Add Notes
- Enter the notes
- Tap Save
We also have a video library filled with quick tutorials that walk through the app’s features 📌 Link here: https://www.youtube.com/@simplywise-estimates/videos
An estimate with both labor an materials included will apply the mark up to materials only. In order to apply mark up to labor only, you’ll need to have an estimate with only labor line items included, or the app will apply it to the materials.
Alternatively, you can manually calculate the mark up and apply a new line item to the estimate. To add the line item, you can use the following steps:
- Tap into the saved estimate
- Tap any +Item on the far right
- The new line item will appear – tap on it to open to Edit Item Screen
- Give the new line item a name
- Select unit
- Select quantity
- Select price per unit
- Tap Save
Currently, there isn’t a way to change suppliers/vendors, and all material pricing is pulled from the closest Home Depot to the zip code registered in your app, or the address/zip included in the project description field. We’re working to expand this!
In the meantime, you can include any pricing specs in the project description field, and the app will use that data when creating the estimate for you.
To use the calendar feature, you’ll want to naviate to the home screen and then tap Calendar on the lower right.
From there, you can schedule your work by tapping the blue Schedule button.
If you don’t see the option to integrate, you can navigate to your device’s settings for the SimplyWise Cost Estimator app and enable those permissions. Once completed, you’ll be able to integrate with your calendar.
You can connect with our Support Team using this link: 📌 https://www.simplywise.com/support
Please note our office hours are 9am-5pm ET Monday through Friday, and we aim to respond to ticket inquiries same day or within 24 hours.
Responses outside of business hours are as time permits.
Currently, we do not have a change order feature online yet, however, as a workaround you can duplicate the original estimate and make changes to resend to your customer which will keep the original estimate separate from the one with changes.
To duplicate the estimate, you can use these steps:
- Tap into the folder where the estimate is saved
- Tap the three dots on the upper right-hand corner
- Tap Duplicate
- Once duplicated, it will appear in at the top of the list with a ~v2 indicating it’s the second version
- Tap into it to make changes and you can send from there
At this time, there isn’t a way to create a single estimate with multiple options (such as Option A and Option B) within the same estimate.
Instead, you can create separate versions of the estimate using one of the following methods:
Option 1: Create two separate estimates
- Tap Create.
- Select Estimate.
- Build your first estimate (Option A).
- Repeat the process to create a second estimate (Option B).
Option 2: Duplicate an existing estimate
- Open the folder where the estimate is saved.
- Tap the three dots in the upper right corner of the estimate.
- Tap Duplicate.
- Open the duplicated estimate and make the necessary changes for Option B.
Duplicating an estimate is often the quickest option since it allows you to keep the original estimate details and only update the items that differ between the two options.
At this time, the client intake form and Magic Link cannot be customized.
Here’s how it works:
- The app automatically generates intake questions based on the project details and scope of work entered by the client.
- As the client provides information, the AI asks follow-up questions that are relevant to their specific project.
- The questions may vary from one project to another depending on the information submitted.
Good to know:
- There is currently no option to add, remove, or edit the questions that appear in the intake form.
- There is also no option to customize the Magic Link itself.
- The intake experience is designed to adapt automatically based on the scope of work provided by the client, and provides the initial information to get the estimate started
- Best practice is to follow up with your client once the form is received to discuss the project details more in depth
You can group labor and material costs by trade by adjusting the Line Item Settings when sending your estimate.
To do this:
- Open your estimate.
- Tap Send.
- Scroll toward the bottom of the Send Estimate screen.
- Locate Line Item Settings.
- Select Show Grouped Line Items.
Available Line Item Settings:
- Don’t Show Line Items – Hides all line item details.
- Show Line Item Names – Displays the names of line items only.
- Show Grouped Line Items – Groups labor and materials together by trade.
- Show Line Items Names & Totals – Displays line item names along with their totals.
Tip: If you’d like labor and materials to be combined and organized by trade category, select Show Grouped Line Items before sending your estimate.
You can quickly merge estimates with a few taps, bringing multiple projects into one document before sending to your client.
To merge estimates, you can use these steps:
- Tap into the folder where the estimates are located
- Tap the blue Select button on the upper right
- Tap on every estimate you would like to merge to select it
- Once selected, you should see a blue check mark on it indicating that it’s been selected
- Once you’ve finished selecting them, tap Merge at the bottom
- Tap Merge to complete the process
- See tutorial below
We also have a video library filled with quick tutorials that walk through the app’s features 📌 Link here: https://www.youtube.com/@simplywise-estimates/videos
The app does not currently offer a fixed labor rate setting or a “reset to default” option.
To use specific labor rates in your estimates:
- Enter your desired labor rates in the Project Description field when creating the estimate.
- Include any pricing preferences, hourly rates, or labor assumptions you’d like the estimate to follow.
- The AI will use those details when generating the estimate.
Example:
- Labor rate: $75/hour for technicians
- Labor rate: $50/hour for helpers
- Use a minimum 2-hour labor charge
Including these details in the project description helps ensure the estimate is generated using your preferred pricing structure.
Your disclaimer text can be saved and reused automatically for future estimates.
To update your disclaimer:
- Open an estimate and tap Send.
- Locate the Disclaimer field.
- Enter or edit your disclaimer text.
- Send or save the estimate.
Once updated, the disclaimer will become sticky, meaning it will automatically appear on future estimates you create.
Good to know:
- The disclaimer will continue to display on new estimates until you change it.
- If you need to update your disclaimer later, simply edit the text in the Disclaimer field again, and the new version will become the default moving forward.
To send a receipt, you’ll want to use the following steps:
- Navigate to the folder where the invoice is saved
- Tap into that folder – you’ll see three tabs at the top: All, Estimates, Invoices
- Tap on Invoices
- Tap on the Invoice that has been paid and needs a receipt
- Tap Payments at the top
- Tap Record Payment
- Apply payment details (amount, payment method, date, and any notes)
- Tap Save
- Tap Not Now on the pop up window when prompted for review (or set up, if preferred)
- Tap Send Receipt
To send an estimate or invoice in PDF format, you’ll want to download it and then send it in PDF format. Alternatively, you can send either to yourself via email, download from that link and then forward from there.
To download an estimate:
- Tap into the folder where the estimate is saved
- Tap the three dots on the upper right corner of the estimate
- Tap Send
- Tap Preview
- Tap the downward facing arrow on the upper right to download to your device
- Once downloaded, it will be PDF format and you can send via your email
To download an invoice:
- Tap into the folder where the invoice is saved
- Tap on the invoices tab at the top
- Tap the three dots on the upper right corner of the invoice
- Tap Print
- It will download and you can send from there
You’ll want to create an invoice first and then apply payments using the payment schedule feature.
To create a quick invoice, you can use these steps:
- Tap into your app on the home screen
- Tap the blue + button on the lower right corner
- Tap Invoice on the pop up menu
- Tap from scratch
- Input all details such as date, invoice number, client, etc.
- Tap the + under Items to add the invoice items
- Tap Add field to add Payment Schedule
- Tap + under Payment Methods to include those as well
- Tap Next when ready to send
- Select a folder where you would like to save it (you’ll see a blue check mark pop up when a folder is selected)
- Tap Continue
- On the Preview Invoice screen, you can make edits by tapping Edit or Send by tapping Send Invoice
To create an invoice from a saved estimate:
- Navigate to the folder where the estimate is saved
- Tap the three dots on the upper right
- Tap Create Invoice
- On the Invoice Customization screen, select All Line Items or Summary
- Tap Next
- Confirm all details (issue date, due date, invoice number, client, etc.) are correct
- Make sure to add Client
- Tap Add Field to add more fields such as payment schedule, photos, attachments, etc.
- To include payment methods, tap Add Payment method
- Tap next (if the button is gray, a required field is missing so look for any field that has a red required above it to ensure it’s completed)
- Tap Send Invoice if ready to send, or Edit to edit again
To add a payment schedule, you’ll want to use these steps:
- Tap into the invoice
- Tap Edit
- Tap add payment schedule
- Add the payment type
- Tap add payment schedule
- Add as many as are needed.
- Tap back
- Tap Update
- Send from there
To send an invoice, you’ll want to use the steps below:
- Tap into the folder where the estimate is saved
- Tap on the three dots on the upper right hand corner of the estimate you want to create an invoice for
- Tap Create Invoice
- Add info at the top such as issue date, due date, invoice number
- Select Client
- Add any deposit or payment method details
- Tap Next
- Select a folder where to save it
- Tap Continue
- Tap Send
To apply payments to your invoice, you can use these steps:
- Tap into the folder where the invoice is saved
- Tap on the invoice
- Tap Payments at the top
- Tap Record payment & enter details
- Tap Save
- Tap Send to send updated invoice showing applied payment(s)
To update your invoice status, you’ll want to record payments and the total will automatically update. To do this, you can use the following steps:
Tap into the folder where the estimate/invoice is saved
Tap into the invoice to the “Preview Invoice” Screen
Tap the “Record Payment” button
Enter the details such as Amount, Payment Method, Date, and any additional notes
Tap “Save” at the bottom
Currently, the annual plan is limited to Apple devices and will be available on Android devices in the future!
If you currently have an existing subscription set up, you’ll want to cancel it first and then wait for it to fully expire. Once canceled, you can locate the expiration date in the App Store under Subscriptions, as well as in the SimplyWise app under menu > settings > my subscription.
Once expired, you can sign up for the annual plan in the App Store or directly with us at www.simplywise.com/payment
If your active subscription billing is being handled via Stripe (you paid directly with us at www.simplywise.com, please connect with our support team at support@simplywise.com and we’ll be happy to help!
If your active subscription billing is being handled via the App Store, please use the steps below to cancel:
Cancel a subscription on your iPhone/iPad
- Open the Settings app.
- Tap your name.
- Tap Subscriptions.
- Tap the SimplyWise subscription.
- Tap Cancel Subscription. If you don’t see Cancel, the subscription is already canceled and won’t renew.
Deleting the app does not cancel your subscription. If you set up your SimplyWise subscription through the Apple App Store or the Google Play Store, you’ll need to cancel within your platform’s settings using the steps below.
📌 Cancel a subscription on your iPhone/iPad
- Open the Settings app.
- Tap your name.
- Tap Subscriptions.
- Tap the SimplyWise subscription.
- Tap Cancel Subscription. If you don’t see Cancel, the subscription is already canceled and won’t renew.
Second, you can get a refund through Apple by contacting them here: https://support.apple.com/en-ca/HT204084
📌 Cancel subscription on your Android
- Open the Google Play app
- At the top right, tap the profile icon.
- Tap Payments & subscriptions
Subscriptions.
- To request a refund, navigate to the bottom to the ‘Help & Feedback’ section
- Select the Refund Option
- Choose SimplyWise
- Complete the form
- See screenshots below for example


To add images to a saved estimate, tap into the folder where the estimate is saved and into the estimate so you can see the details of the estimate.
At the top, you’ll see a series of icons – tap on the icon labeled, “Photos” and tap the + under the Photos section.
Once uploaded, you can then tap the + under the Project Render section to run the image render feature.
Watch the tutorial below, and follow along in your app to quickly add images to your estimate.
The image rendering feature is a great way to show your client what to expect with the finished project!
You have three ways to access it:
- While creating a new estimate — Just add photos during the creation process
- As a standalone feature — Tap the “Render” button on your home screen (or find it in the blue + button).
- Adding to a saved estimate — Tap into your saved estimate, select the ‘Photos’ icon at the top, and use the + buttons to add images and generate renders
Watch the tutorials below to learn how to best use each method!
Currently, the Cost Estimator does not integrate directly with QuickBooks. However, you can download your estimates and invoices from your SimplyWise account and then upload them to QuickBooks manually.
If you’d like to see a QuickBooks integration in the future, feel free to let our support team know — we love hearing your feedback!
To update or edit the invoice number, you can use the following steps and follow along with the tutorial below!
- Tap into the folder where the Invoice is saved
- Tap into the invoice to the “Preview Invoice” screen
- Tap Edit
- Tap into the Invoice # field on the upper right corner and make changes there
- Tap the blue “Update” button on the bottom when you’re ready to save
To send a paid receipt, make sure you have recorded all payments in the invoice. Once applied, you can tap into the folder where the invoice is saved and into the invoice, and tap Send Invoice.
To create an invoice without creating an estimate first, you’ll want to tap the blue +circle button on the lower right corner. On the pop up menu, tap the Invoice button.
Complete the fields and tap Next at the bottom and follow the prompts to save and send.
Follow along with our tutorial below!
To edit an invoice, you can use these steps:
- Navigate to the folder where the invoice is saved
- Tap into it to the preview invoice screen
- Tap Edit
- On the Update Invoice screen, tap the + under the line items to add more
- Once done, tap Save
- Tap Update
We also have a video library filled with quick tutorials that walk through the app’s features if you think that would be helpful. 📌 Link here: https://www.youtube.com/@simplywise-estimates/videos
To show payment terms on the invoice, you’ll want to follow these steps:
- Create your invoice (either from the main menu on the home screen, or from a saved estimate)
- Once you create your estimate, or tap into a saved estimate, you can cap the Edit button
- On the Update Invoice screen, tap the check box next to Payment Schedule
- Select Payment Type
- Enter Payment Date and Amount
- Invoice will automatically update with information entered
You can make changes anytime here as well as apply payments when needed by tapping the Record Payment button on the Preview Invoice Screen
Yes! When creating an invoice from an existing estimate, you can choose how much detail your customer sees.
After selecting your estimate and tapping Create Invoice, you’ll reach the Invoice Customization screen where you can toggle between:
- All line items — shows the full breakdown of every item, labor, and material
- Summary — shows a single total per section, without individual line item detail
Tap your preferred option before sending.
Note: This option is currently only available when generating an invoice from an existing estimate. If you create an invoice from scratch, you can manually control what appears by adding only the line items you want your customer to see.
If you have questions, contact us at support@simplywise.com.
Sending an invoice in your Cost Estimator app is done with a few taps.
To get started, tap the Projects tab on the lower right corner and then tap into the folder where the invoice is saved and tap into the invoice.
On the Preview Invoice screen, tap the blue Send Invoice button and select the method you’d like to send.
Follow along in our tutorial below!
Yes! While we’re US based, we are available in Canada! You’ll need to have a phone number with a +1 at the beginning to create your account and select your subscription.
There are several options to show or hide line items when sending an estimate to your client or customer.
To do this, you’ll want to navigate to the Send Estimate screen and scroll down to the Estimate section where the Line Items options is located.
You’ll see four different options, each of which show more or less detailed info to your client/customer:
- Don’t show line items
- Show line item names
- Show grouped line items
- Show line items names & totals
Join us for the tutorial below to walk through the steps and see which one works best for your needs!
To add fees to your estimate, you’ll want to add them as a line item using the steps below:
- Navigate to the folder where the estimate is saved
- Tap into the estimate to view the line items
- Tap any + Item on the far right
- Label the new line item such as fees or credit card processing fee
- Select the unit as 1
- Add the price
- Tap Save
- This will now be added as a line item in the estimate
- You can let the client see or or elect to hide it when sending by removing the ability for them to see line items
To hide the mark up from the estimate, open your saved estimate from the folder and tap line items. Scroll to the bottom and swipe from right to left and tap the red trashcan icon.
If you want to include the markup in your estimate for your visibility, but hide this from your client by making it invisible on the estimate they receive, you’ll want to uncheck the Markup box in the Share Estimate screen before sending to them.
Editing the notes and disclaimer fields is quick and can be completed with a few taps using the steps below.
- Tap the Projects tab on the lower right corner
- Tap into the folder where the estimate is saved
- Tap the three dots on the upper right corner
- Tap Send Estimate
- On the Send Estimate screen, scroll down to the bottom and you can make changes in the Notes Field or the Disclaimer Field (or both!) by tapping the three dots on the right corner and tapping Edit.
Take a look at the tutorial below to walk through the steps!
To receive a notification when an estimate is opened, viewed, or approved you’ll want to enable the notifications settings in your Cost Estimator mobile app.
To do this in your mobile app, tap menu>settings>permissions and enable notifications within your device settings.
Currently, you’ll receive notifications when a client opens and approves an estimate.
When a client *opens* an estimate, you’ll get a push notification letting you know they opened – however, there will be no other update within the app.
When a client *approves* an estimate, you will receive both a push notification and an email with detailed information about the approved estimate.
While the Receipt Scanner app allows you to view both estimates and receipts in one place, the Cost Estimator app is currently designed to display estimates only. The ‘Spaces’ functionality and receipt viewing are exclusive to the Receipt Scanner app and not available in the Cost Estimator app.
Currently, we cannot directly turn an estimate into a work order within the app. However, we offer an invoicing feature where you can define payment options and payment terms. To send an invoice, please follow these steps:
1. Tap into the estimate folder
2. Tap on the 3 dots in the top right corner of the estimate
3. Select ‘Send Invoice’
We are still developing this feature, so any feedback you provide would be valuable to us!
Currently, we don’t have a feature to consolidate multiple projects into a single project. As a workaround, you can email all the estimates to yourself and then use a PDF software such as Adobe to combine them and add the comprehensive price before sending them by email to your client.
We’re constantly working on improving our app features, and consolidating estimates is a priority for a future update. Please stay tuned for this enhancement in upcoming versions!
Reconciliation features are not available in the Cost Estimator app; they are available in the Receipt Scanner app and can be located by tapping Menu > Reconciliation on the side bar menu.
You can access the web version of the Cost Estimator by logging in at: app.simplywise.com
Currently, the web version is still being developed and doesn’t offer full functionality. On a computer today you can create and edit estimates, but the mobile app has the full feature set including:
- Room Scan (LiDAR measurements)
- Image Renders
- Voice-to-Text
- All integrations
We’re actively working to expand the web features — stay tuned! 📌 Need help getting started? Check out our video tutorial library for quick walkthroughs!
To get started, just to tap on the blue circle + button in the lower right corner of the Home screen.
You’ll see a little pop up menu where you can select to create an Estimate, an Invoice, or an Image Render.
Tap Estimate when you’re ready to input the full scope of work, create an estimate and send to your client.
Tap Invoice if you’d like to quickly create a simple invoice to send to your clients to collect payment.
Tap Render if you’d like to create an image render based on the changes you’d like to see in the before image.
Join us for our quick tutorial below to see how it works a bit more in detail.
Yes! You can use the Cost Estimator on your Chromebook through our web app.
To use the Cost Estimator on Chromebook:
- Open Chrome browser
- Go to app.simplywise.com
- Log in with your phone number or email
The web app gives you full access to:
- Create and edit estimates
- Manage clients
- Send invoices
- Access all your templates
Note: While the Android app may not install directly on some Chromebooks, the web app works perfectly and syncs with your mobile app automatically.
The app is designed for both contractors and homeowners, and is suitable for DIY projects, small businesses in skilled trades, and large commercial construction projects.
The app doesn’t currently offer built-in payment processing. However, you can easily include your preferred payment methods directly in your invoices so customers know how to pay you.
To add payment methods to your invoice:
- Tap into the folder where the estimate/invoice is saved
- Tap the three dots in the upper right corner
- Tap Create Invoice (or tap into an existing invoice)
- Scroll to the Payment Methods section and tap the +
- Select the payment methods you accept (Venmo, Zelle, PayPal, Check, etc.)
- Add your payment details or links in each field
- Tap Save
Your customers will see these payment options when they receive the invoice, making it easy for them to pay you using their preferred method.
We also have a video library with quick tutorials. 📌 Link here
You can quickly collect payment using your Cost Estimator app by including your payment links directly in your invoice so your clients can submit payment faster and projects get started sooner!
To do this, you can use these steps:
- Tap the projects tab on the lower right corner
- Tap into the folder where the invoice is saved
- Tap Edit
- Tap the + under Payment Methods
- Select applicable methods that your clients can use to submit payment
- Enter those details such as payment links or IDs in each payment method
- Tap Save
Follow along in our tutorial below to see how to get started.
Recording a payment on your invoice is quick and easy with a few steps!
Tap Projects tab on the lower right and then tap into the folder where it’s saved and tap into the invoice to view the details.
Once there, tap record payment to record any paid payments, or tap Edit to add Deposit details and even update payment methods accepted to collect payment.
To print your estimate, you can use the steps below, or you can send the estimate to yourself like the below tutorial walks through and print from there.
- Tap into the folder where the estimate is located
- Tap on the estimate to view the line items screen
- Tap the three dots on the upper right corner
- Tap Print Estimate
- Estimate will download to your device where you can share it with someone else, or send to yourself to print
The room scan feature is a great way to get measurements and a 3D model of the space of your project. To get started, tap the blue + button on the home screen, and then tap Room Scan and start from there. Be sure to save it once created, or you won’t be able to access it later if needed.
To attach a room scan to an estimate before creating the estimate, you’ll want to generate the room scan first. Once you have your room scan saved, you can tap the blue + button and then tap estimate.
This will bring you to the Project Description screen where you’ll input the scope of work. Under the text box, you’ll see a series of icons; the third icon from the left (diamond shape) icon is what you’ll tap to access the saved room scans and attach what you need.
Note: For now, this feature is only available on Apple Pro devices, although we are working to expand the devices we serve with this feature.
We also have a video library filled with quick tutorials that walk through the app’s features if you think that would be helpful. 📌 Link here: https://www.youtube.com/@simplywise-estimates/videos
Currently, the Room Scan / LiDAR feature is only available on Apple Pro devices (iPhone Pro, iPad Pro) due to required hardware sensors — this is a hardware restriction, not a subscription restriction. It is not currently available on Android.
To start a Room Scan:
- Tap the blue Create + button on the home screen
- Tap Room Scan (also referred to as LiDAR)
- Tap Start Scan
- Follow the prompts to scan your space
⚠️ Be sure to save once created, or you won’t be able to access it later!
To attach a Room Scan to an estimate:
- Generate and save the room scan first
- When creating a new estimate, attach the saved scan by selecting Room Scan / LiDAR on the ‘Describe Project’ screen
We apologize for any confusion — we’re working on expanding device compatibility! 📌 Need help? Check out our video tutorial library for walkthroughs!
You can download any estimate as a PDF to share with customers who prefer attachments over links.
To download your estimate as a PDF:
- Open the folder where your estimate is located
- Tap the three dots in the upper right corner
- Select “Send Estimate”
- Tap “Preview”
- On the Preview & Send screen, tap the download arrow in the upper right corner
- This will save the estimate as a PDF directly to your device
To print your estimate:
Once you’ve downloaded the PDF using the steps above, you can print it directly from your device’s file manager or share it to a printer.
📌 Need more help? Check out our video tutorial library for step-by-step walkthroughs!
When sending an estimate via the app, there is a default email message that you can customize to fit your needs and your preferences.
To make edits, you’ll want to go through the flow of sending an estimate to get to the Send Estimate screen.
Once there, scroll down to the “Message” section, tap the three dots on the upper right and then tap “Edit” from the drop down menu, and make changes there.
Please note this message is visible when selecting to send using the “email” button and sending from the app. When selecting “other sharing options”, you will be able to customize your own message when sending from your desired platform.
Follow along with our quick tutorial below!
To edit the subject line for an estimate being sent via email, you can do this while sending the estimate or from a previously saved estimate.
When sending a recently generated estimate, you can make changes on the Share Estimate screen or directly in the email subject line before sending.
If you have a saved estimate that you would like to edit, you’ll want to tap into the saved estimate, tap the three dots on the upper right > send estimate > preview(x2) > share estimate > email > select email from your phone > edit subject line.
To send your saved estimate, you’ll want to tap into the folder where you’ve previously saved it and you can either tap the three dots on the upper right and tap Send Estimate, or tap into the estimate and do the same – tap on the three dots on the upper right corner and tap Send Estimate.
From there, you’ll want to tap Preview and then Send.
You’ll have two options to send – via the app using the “email” button and via a variety of other methods (text, FB, etc.) including sending directly from your own email app on your device.
Follow along in the the tutorial below and quickly send out your estimates!
If your clients are finding your estimates in spam or junk, this is typically a deliverability issue with how the email is being sent. Here are the most effective fixes:
Option 1 — Send from your own email address (recommended):
Instead of using the app’s default send, choose “Other sharing options” when sending and email the estimate from your own email account (Gmail, Outlook, etc.). Emails from a personal or business address you’ve used before are far less likely to land in spam.
Option 2 — Ask your client to whitelist SimplyWise:
Have your client add the SimplyWise sending address to their contacts or safe senders list. This tells their email provider to trust future messages.
Option 3 — Share via link instead of email:
You can copy the estimate link and send it via text message, WhatsApp, or any other channel — bypassing email deliverability entirely.
If you’re seeing a “Failed to send” error when tapping the Ask for Review button after sending an invoice, this is a known issue our engineering team is actively investigating.
In the meantime:
- Try closing and reopening the app, then attempt to send the review request again
- Make sure your client’s email address on the invoice is correct
- If the error persists, you can manually ask your client for a review by sending them a direct link to your preferred review platform (Google, Trustpilot, etc.)
If the issue continues, please contact support at support@simplywise.com with your device type and app version so our team can investigate.
Unfortunately, the approval feature cannot be turned off at the moment. However, to share an estimate without the signature and approval flow, you can follow these steps:
1. Generate the estimate
2. Preview the estimate
3. Download it as a PDF
4. Share the downloaded PDF directly with your client. This way, you can share your estimate without requiring the client to go through the formal approval process.
To change your default email address when sending an estimate, go to Menu>Business Info and update your business address there.
To customize the subject line and email message when sending an estimate:
1. Tap into the folder where the saved estimate is located that you would like to send.
2. Tap the three dots on the estimate you would like to send via email.
3. Tap “Send Estimate”.
4. Review all details and make any changes needed.
5. Tap “Review & Send” at the bottom.
6. On the Review Estimate screen, scroll to the bottom and tap “Send Estimate”.
7. Tap “Email” on the pop-up.
8. On the “Confirm Email Delivery” pop-up screen, customize the Email Subject Line and Email body.
9. Tap Send Estimate when completed.
You can edit the disclaimer on your estimates by following these steps:
1. Tap into the folder where the estimate is saved.
2. Either tap the three dots in the upper right corner, or open the estimate and then tap the three dots in the upper right of the details screen.
3. Select “Send Estimate.”
4. Scroll to the bottom of the send screen — you’ll see a box labeled “Disclaimer.”
5. Tap the three dots in the upper right corner of that box, then select “Edit.”
6. Once you’ve made your changes, tap the “X” to close out of the disclaimer editor.
You can see if your estimate has been approved by:
1. Checking for push notifications. You’ll receive both an email and a push notification when your client approves the estimate.
2. Looking at the estimate status in the app. When a client signs and approves your estimate, its status will automatically update from “Sent” to “Approved”. You can see this status change in the folder where the estimate was saved.
After sharing your estimate with a client, you can track its status in several ways:
1. You’ll receive a push notification when your client opens the estimate.
2. In the app, locate estimates in their saved folders. You can filter estimates by status at the top of a folder (Sent/Approved) to quickly find what you’re looking for.
3. When your client signs and approves the estimate, the status will automatically update to ‘Approved’, and you’ll receive both an email and push notification alerting you to this change.
Since estimates are sent via email or text message, there is no way to unsend them directly from the SimplyWise app. You can manage this via your email or text service, depending on the platform you used.
You should receive push notifications when your client approves an estimate. If you’re not receiving push notifications, please check your notification permissions in both your device settings as well as your settings in the Cost Estimator app.
Go to your device Settings > find our app > Notifications, and ensure notifications are enabled. Additionally, verify in-app notification settings by going to app Settings > Permissions > Notifications and enable notifications from there.
To toggle between the SimplyWise: Cost Estimator app and the SimplyWise receipt app; SimplyWise mileage app; or SimplyWise AI receptionist app, tap the menu in the upper left corner, and then tap SimplyWise Suite. All subscribed apps will be on the screen, and you can tap into each of them at any time.
Cancel a subscription on your iPhone/iPad
- Open the Settings app.
- Tap your name.
- Tap Subscriptions.
- Tap the SimplyWise Cost Estimator subscription.
- Tap Cancel Subscription. If you don’t see Cancel, the subscription is already canceled and won’t renew.
If you subscribed through the Google Play Store or Apple App Store, SimplyWise support cannot access or modify your subscription — you’ll need to cancel and request a refund directly through the app store you used.
On Android (Google Play Store):
- Open the Google Play app
- At the top right, tap the profile icon
- Tap Payments & subscriptions → Subscriptions
- Select the SimplyWise Cost Estimator subscription
- Tap Cancel subscription and follow the instructions
- To request a refund, tap Request a refund after cancelling
On iPhone/iPad (Apple App Store):
- Open the Settings app
- Tap your name
- Tap Subscriptions
- Tap the SimplyWise Cost Estimator subscription
- Tap Cancel Subscription
- If you don’t see Cancel, the subscription is already cancelled and won’t renew
- To request a refund, visit reportaproblem.apple.com
If you subscribed directly through SimplyWise (not via an app store), contact support at support@simplywise.com.
If you’ve previously cancelled your Cost Estimator subscription and want to reactivate it:
If your subscription has already expired:
- Open the Cost Estimator app — you should see a prompt to resubscribe
- Tap Subscribe or go to Menu > Settings > My Subscription
- Choose your plan (monthly or annual) and complete the purchase
If your subscription is cancelled but hasn’t expired yet:
Your access will continue until the end of the paid period. You can resubscribe at any time through the same steps above — your data will still be there.
Note: If you subscribed through the App Store or Google Play, your subscription is managed through that platform. You can also resubscribe directly at simplywise.com/payment.
The Cost Estimator subscription varies whether you sign up through the App Store (iPhone/iPad) or Google Play Store (Android); all pricing is available in each platform.
You can subscribe directly within the app. If you have questions about billing or need help with your subscription, you can reach us at support@simplywise.com.
Great question! Deleting ANY SimplyWise account from the menu settings inside the app WIPES ALL DATA across ALL SimplyWise apps.
It would be best to delete the app from your device if you no longer want it, but do not delete the account for any SimplyWise app as this will remove all data across any other SimplyWise apps installed on your device and it cannot be recovered.
SimplyWise apps offer a free trial that automatically converts to a paid subscription when the trial ends — unless you cancel before it expires.
If you were charged unexpectedly:
- Check when your trial started and whether it has ended — you can view this in the app under Menu > Settings > My Subscription
- If you believe you cancelled before the trial ended and were still charged, you’ll need to request a refund through the app store you used to subscribe:
iPhone/iPad: reportaproblem.apple.com
Android: Open Google Play > tap your profile icon > Payments & subscriptions > Subscriptions > Request a refund
SimplyWise support cannot issue refunds for app store purchases — these must go through Apple or Google directly.
Unfortunately, we do not currently offer a team plan for the Estimator app. However, you can share your account with someone else by having them download the app on their device and log in using your phone number and password. Keep in mind they will have full access to your account with no way to limit their access.
You can use the app across different devices by downloading the app and using the same login credentials on each device. All your estimates will be synced and accessible from any device.
You can also login to www.simplywise.com on a computer so that you or your teammates can access your account there.
Please note that while estimates are synced across all devices, certain settings are not synchronized, including markup settings, and business information. These will need to be set up individually on each device.
Currently, the Cost Estimator subscription includes access to all apps within the SimplyWise suite.
You’re welcome to enjoy any/all of the following with an active Cost Estimator subscription:
- Cost Estimator
- Receipt Scanner
- AI Receptionist
- Mileage Tracker
- Website Builder
To check which apps you’re currently subscribed to, go to your device’s subscription settings:
- iPhone/iPad: Settings > [your name] > Subscriptions
- Android: Google Play > profile icon > Payments & subscriptions > Subscriptions
You can also toggle between apps by tapping Menu on the upper left > SimplyWise Suite
In your mobile app, tap Menu>Settings>My Subscription and you will be able to view from there.
If you subscribed through the App Store or Google Play Store, you can update your payment method in your device’s app store settings.
If you paid directly through Stripe, please contact us at support@simplywise.com for a secure updated link. If you paid directly through PayPal, you can modify your payment details in your PayPal account.
If you’re unsure which method you used or need assistance, please contact our Support Team at https://www.simplywise.com/support.
To add your taxes, you’ll want to tap into the saved estimate where all of the line items are on the estimate details screen.
From there, you can tap any blue +Item on the far right to add a line item from there; if you need to add a percentage, you’ll want to tap on the +markup.
Be sure to check out our video library filled with quick tutorials that walk through the app’s features if you think that may be helpful as you get started. 📌 Link here: https://www.youtube.com/@simplywise-estimates/videos
To view an estimate you previously saved in the app, you can either search for it using the search bar on the homescreen (e.g. you can search “Davidson Kitchen Remodel”.
Alternatively, you can tap into the Projects folder at the bottom, tap into the folder where it’s saved and scroll down until you find the estimate.
Then, you should be able to tap into the estimate to see the estimate details.
To use the voice to text feature when creating an estimate, you’ll want to tap blue circle + button on the home page and tap Estimate.
On the Project Description page, tap the blue microphone button and speak the details of your estimate.
Follow along in our tutorial below!
The SimplyWise Cost Estimator app is available on both Android and iOS smartphones, as well as iPad and tablets. You can also access your account on a computer by visiting www.simplywise.com and selecting “Cost Estimator,” then logging in. Please note that while the web version is available, it currently has limited functionality compared to our mobile and tablet apps, which offer the full range of features and optimal user experience.
If you’re seeing unexpected charges from SimplyWise, here are the most common reasons:
**Free Trial Conversion:**
Most SimplyWise apps offer a free trial that automatically converts to a paid subscription if not canceled. Check your app store subscriptions to see if your trial has ended.
**Multiple App Subscriptions:**
SimplyWise offers several apps (Cost Estimator, Receipt Scanner, Mileage Tracker). Each app has its own subscription. You may have subscriptions for multiple apps.
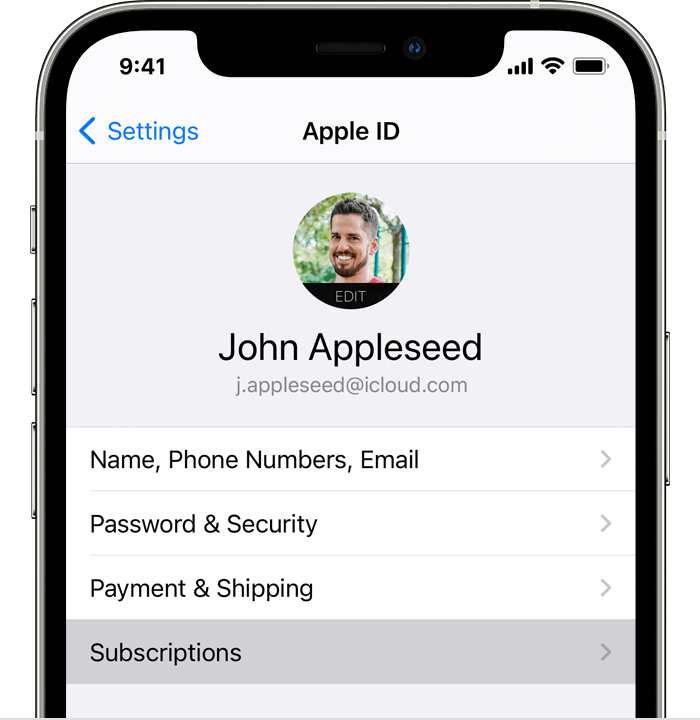
**How to Check Your Subscriptions:**
– iOS: Settings > Apple ID > Subscriptions
– Android: Google Play Store > Profile > Payments & Subscriptions
**To Cancel:**
– Cancel directly through your app store subscription management
– Contact support if you need assistance: support@simplywise.com
**Refund Requests:**
For recent charges you believe are in error, contact our support team with your receipt or subscription details.