Construction Scheduling · 2026 Playbook
Construction Scheduling: Tools, Templates, and Best Practices for 2026
How to keep projects on track, crews productive, and clients informed without drowning in spreadsheets.
In a hurry? Price a job from a photo in about six seconds.
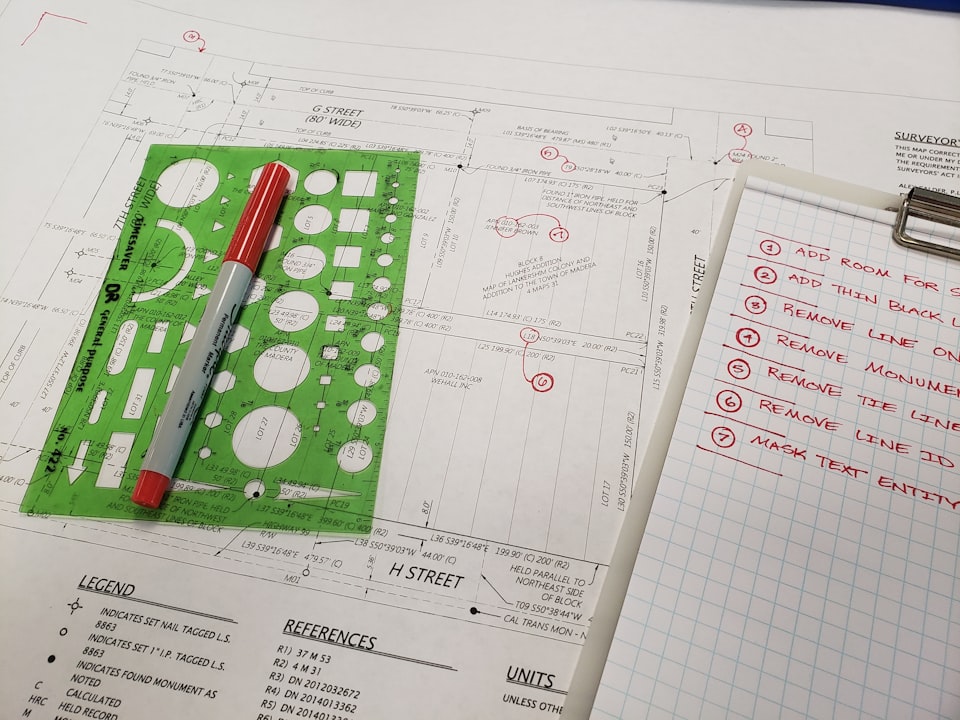
The Domino Effect of One Missed Deadline
Picture a job where the electrician was supposed to start Monday. He does not show. Now the drywall crew that was locked in for Wednesday has another job starting Thursday, so they cannot push back. The painter who was scheduled for next week just lost her window. And the client, who already told their in-laws they would be hosting Thanksgiving in the new addition, is calling you for the third time today.
One missed day turned into a two-week delay. That is not bad luck. That is a scheduling failure.
Construction scheduling is not about creating a pretty timeline and hoping everyone sticks to it. It is about building a realistic plan that accounts for the chaos of real job sites, communicating that plan to everyone who touches the project, and adjusting it before small problems become expensive ones.
THE REALITY
Schedule overruns are common in commercial construction, and residential projects can slip for the same basic reasons. The contractors who consistently deliver on time are not lucky. They have a system.
Why Most Contractor Schedules Fail
Before we talk about how to build a good schedule, let us talk about why most schedules fall apart within the first two weeks.
1. Too Optimistic From Day One
You know the framing will take 10 days if everything goes perfectly. So you put 10 days on the schedule. But when has everything gone perfectly? You are building your plan around best-case scenarios and then acting surprised when reality shows up.
Optimistic scheduling is not confidence. It is denial. Every experienced contractor knows that the gap between “how long this should take” and “how long this actually takes” is where projects go sideways.
2. No Buffer Between Trades
Stacking trades back to back with zero transition time looks efficient on paper. In the field, it means one delay cascades through every trade behind it. The plumber runs a day long. Now electrical is a day late. Now insulation is a day late. Now drywall pushes into the weekend. Each trade that shifts forces a rebooking conversation with a sub who may not have availability for another week.
3. No Communication System
The schedule lives in your head, or maybe in a spreadsheet on your laptop. Your subs do not have it. Your client does not have it. When something changes, you make a few phone calls and hope the message reaches everyone. It does not.
A schedule that only one person knows about is not a schedule. It is a wish list.
4. No Owner for the Schedule
If nobody is responsible for updating the schedule daily, it goes stale within a week. “We will figure it out as we go” is not project management. It is gambling with someone else’s money.
THE BOTTOM LINE
Bad schedules are not caused by unpredictable events. They are caused by predictable events that nobody planned for.

The 3 Scheduling Methods Every Contractor Should Know
You do not need a project management degree to schedule construction work effectively. But you do need to understand the three main approaches so you can pick the right one for your project.
1. Gantt Charts
What it is: A visual bar chart that shows each task as a horizontal bar across a timeline. Tasks can overlap, and you can see at a glance what is happening when.
Best for: Residential projects, remodels, and any job where you are managing 3 to 8 trades. Most contractors are already doing a version of this in their heads. Putting it on paper makes it shareable and trackable.
How to use it: List every task down the left side. Draw a bar for each one showing start date, duration, and end date. Color-code by trade. Identify where tasks overlap and make sure those overlapping trades can actually work on site at the same time without tripping over each other.
Weakness: Gantt charts show what is happening when, but they do not automatically show which tasks depend on other tasks. You have to add those dependency links yourself.
2. Critical Path Method
What it is: A scheduling technique that identifies the longest sequence of dependent tasks from start to finish. That sequence is the critical path. Any delay on a critical path task delays the entire project.
Best for: Larger projects with many interdependent trades, commercial work, and any job where the completion date is contractually binding with penalty clauses.
How to use it: Map out every task and its dependencies. Calculate the earliest start and latest start for each task. The tasks where earliest start equals latest start are on the critical path. Those are the tasks you cannot afford to delay.
Weakness: Requires more upfront planning and regular updating. Overkill for a bathroom remodel, but essential for a ground-up build.
3. Pull Planning
What it is: Instead of pushing tasks forward from a start date, you start from the completion date and work backward. Each trade commits to what they need and when they need it from the trade before them.
Best for: Projects with tight deadlines and multiple subcontractors who need to coordinate closely. Common in commercial and industrial construction.
How to use it: Gather your key subs in a room or on a call. Start with the completion date on the wall. Work backward, asking each trade: “What do you need finished before you can start, and how long do you need?” Each trade pulls the schedule based on real commitments, not your guess about their timeline.
Weakness: Requires buy-in from all subcontractors and a willingness to plan collaboratively. Does not work if your subs do not show up to the planning session.
WHICH ONE TO PICK
For most residential contractors, a well-built Gantt chart with dependency notes is all you need. Use critical path when the project is large enough that a single delay could trigger penalty clauses. Use pull planning when you have a fixed deadline and cooperative subs.
Build a job baseline with SimplyWise Cost Estimator, free to try
Building a Realistic Project Schedule
The most important word in that heading is “realistic.” A schedule that makes you look good in the sales presentation but falls apart in week two is worse than no schedule at all because it sets expectations you cannot meet.
Step 1: Start From the Deadline and Work Backward
If the client needs the project done by December 1, start there. Work backward through each phase: punch list, paint, trim, drywall, inspections, rough-ins, framing, foundation, permits. Assign realistic durations to each phase. If the math says you need to start September 1 and today is September 15, you have a problem. Better to know that now than in November.
Step 2: List Every Task, Not Just the Big Ones
It is not enough to write “plumbing rough-in” as one task. Break it down: underground rough, supply lines, drain lines, pressure test, inspection. Each sub-task has its own duration and dependency. The detail is where accuracy lives.
Step 3: Talk to Your Subs Before Committing Dates
Do not guess how long the electrician needs. Call them. Ask: “If I have the walls open and ready for you on October 14, how many days do you need for rough-in?” Their answer might surprise you. A task you assumed would take 3 days might take 5 because they are running a smaller crew this month.
Step 4: Identify Dependencies
Which tasks cannot start until another task is complete? Drywall cannot start until rough-in inspections pass. Paint cannot start until drywall is finished and sanded. Tile cannot start until the waterproofing membrane has cured. Map these dependencies explicitly. They are the skeleton of your schedule.
Step 5: Add Buffer at Milestones
Do not add buffer to every single task. Instead, add buffer at major milestone transitions. Between foundation and framing, add 2 days. Between rough-in completion and drywall, add 2 days. Between drywall and finishes, add 2 days. These buffers absorb small delays without disrupting the entire downstream schedule.
Step 6: Lock It In and Share It
Once the schedule is built, share it with every subcontractor, your crew, and a simplified version with the client. If it is not shared, it is not real.
PRO TIP
Keep a log of how long tasks actually take on every project. After 5 to 10 projects, you will have real data to replace guesswork. That log becomes your competitive advantage in scheduling accuracy.

Weather, Inspections, and Material Delays
These three things will derail more schedules than anything else. They are also completely predictable in the sense that you know they will happen. You just do not know exactly when.
Weather
If you are scheduling exterior work in the Pacific Northwest in November, plan for rain days. If you are pouring concrete in Phoenix in July, plan for early morning pours because afternoon temperatures will compromise the cure. If you are roofing in the Midwest in March, plan for wind days.
Look at historical weather data for your region and season. If the average is 4 rain days each month, build 4 rain days into each month of exterior work. This is not pessimism. It is math.
Inspections
Inspection delays are one of the most common schedule killers, and they are almost entirely avoidable with planning.
- Schedule inspections early. Call the building department as soon as the rough-in is 80% complete, not after it is done. Some jurisdictions have 3 to 5 day lead times for scheduling.
- Know your inspector’s schedule. Some inspectors only do certain areas on certain days. Build that into your plan.
- Do a self-inspection first. Walk the work yourself with the code book before calling for the official inspection. A failed inspection costs you days, not hours.
- Have the next trade ready. When the inspection passes, the next trade should be able to start the following day. Do not waste the momentum.
Material Delays
Lead times have stabilized compared to 2021 and 2022, but custom materials, specialty fixtures, and certain lumber species still carry lead times that can wreck a schedule.
- Order long-lead items at contract signing. Windows, custom cabinets, specialty tile, and HVAC equipment should be ordered before the first shovel hits dirt.
- Confirm delivery dates weekly. Do not assume the date your supplier gave you two months ago is still accurate. Call and confirm.
- Have substitution plans. If the client picked a tile with a 10-week lead time, discuss a backup option in case it does not arrive on schedule.
- Stage materials on site ahead of need. If you have the space, get materials delivered 3 to 5 days before you need them. This eliminates same-day delivery as a single point of failure.
THE BOTTOM LINE
You cannot control the weather, the inspector’s calendar, or your supplier’s warehouse. But you can plan for all three. The contractors who build contingency into their schedules are not slower. They are more honest about how construction actually works.

Communicating Schedule Changes to Clients
Here is where most contractors lose trust. The schedule slips by a week, and instead of telling the client, they try to quietly recover it. Sometimes they do. Most of the time they do not, and now the delay is two weeks and the client finds out from the drywall crew, not from you.
Proactive vs. Reactive Communication
Proactive, what you want: “We got hit with two rain days this week and the inspection is backed up until Wednesday. That pushes drywall start to next Monday instead of this Friday. We should still make the overall completion date because I built some buffer into the schedule, but I wanted you to know.”
Reactive, what kills trust: Client calls on Friday asking why no one is on site. You say, “Yeah, we had some delays. Not sure when we will be back.”
The content of the message is almost the same. The timing changes everything.
The 24-Hour Rule
When you know the schedule is shifting, tell the client within 24 hours. Do not wait until you have a full recovery plan. A quick update that says “here is what happened, here is what I am doing about it, and I will have an updated timeline by tomorrow” is far better than silence.
What to Include in a Schedule Update
- What changed and why, such as inspection delay, material delay, weather, or sub availability.
- What the impact is on the overall timeline, not just “we are behind” but “we are behind by X days.”
- What you are doing about it, such as rescheduled the sub, overlapping two trades, or added a crew member.
- What the new target date is for the next milestone.
Keep It Written
Send schedule updates in writing. A text or email creates a record. If the client later claims you never told them about a delay, you have proof. Phone calls are fine for the initial conversation, but follow up with a written summary.
PRO TIP
The clients who leave the best reviews are not the ones whose projects went perfectly. They are the ones who felt informed the entire time. Communication is the cheapest insurance policy you can buy.
Turn the next job photo into an itemized estimate, free to try
Daily and Weekly Schedule Management
A schedule is not a document you create once and file away. It is a living tool that needs daily attention. The contractors who stay on schedule are not the ones with the best plans. They are the ones who update the plan every single day.
The Morning Huddle (10 Minutes)
Before work starts, gather your crew for a quick standup. Cover three things:
- What is happening today. Which tasks, which areas of the site, which trades are on site.
- What could go wrong. Is the material delivery confirmed? Is the inspector coming? Is the weather holding?
- What needs to be ready for tomorrow. If electrical is finishing today, is the insulation crew confirmed for tomorrow morning?
Ten minutes. No coffee shop conversation. Just the three questions and back to work.
End-of-Day Check (5 Minutes)
Before you leave the site, answer one question: are we on schedule? If yes, great. If no, what is the gap and what are you doing about it tomorrow? Update your schedule document. Send the client a quick text if anything has shifted.
Weekly Schedule Review (30 Minutes)
Once a week, sit down with the full schedule and do a proper review:
- Compare plan vs. actual. Which tasks finished on time? Which ran long? By how much?
- Look two weeks ahead. Are the subs confirmed? Are the materials ordered? Are the inspections scheduled?
- Update the critical path. Has the critical path shifted because of changes this week?
- Communicate changes. If the schedule shifted, send updates to affected subs and the client.
The Weekly Client Update
Pick a day. Friday afternoon works well. Send the client a brief update: what got done this week, what is planned for next week, any changes to the overall timeline. This takes 5 minutes and prevents many “what is going on with my project” phone calls.
THE BOTTOM LINE
Daily attention prevents weekly crises. Weekly reviews prevent monthly disasters. The 45 minutes per week you spend managing the schedule will save you hours of recovery, rework, and difficult client conversations.
Try SimplyWise Cost Estimator Free
Keep Reading
- How to Bid a Construction Job: Accurate bids set the foundation for realistic schedules and profitable projects.
- The Complete Guide to Construction Change Orders: When the scope changes, the schedule changes. Handle both the right way.
- How to Scale Your Construction Business: Scheduling discipline is the backbone of running multiple projects without burning out.
Sources
- U.S. Bureau of Labor Statistics, Occupational Outlook Handbook, Construction Managers (construction managers plan, coordinate, budget, and supervise construction projects).
Frequently Asked Questions
What is the best scheduling method for residential contractors?
For most residential projects, a simplified Gantt chart is plenty. You do not need complex critical path analysis for a kitchen remodel. A visual timeline showing each trade, their start and end dates, and how they overlap gives you and the client a clear picture. Save critical path for projects with 10 or more trades or tight deadlines with zero room for slippage.
How much schedule buffer should I build in?
10 to 15% of total project duration is a good rule of thumb. On a 12-week project, that is roughly 1 to 2 weeks of buffer. Place the buffer at major milestone transitions, not just tacked onto the end. If you have a 3-week framing phase, add 2 to 3 days of buffer before the next trade arrives.
How do I handle a subcontractor who keeps showing up late or not at all?
Have a direct conversation first. Explain the downstream impact of their delays on other trades and the overall project timeline. If the pattern continues, start scheduling a backup sub for critical path tasks. Include schedule adherence requirements in your subcontractor agreements with clear language about what happens when commitments are missed.
Should I share the full project schedule with clients?
Share a simplified version that shows major milestones and phase completion dates. Do not share the detailed trade-by-trade breakdown. Clients will fixate on individual task dates and question every minor adjustment. Give them enough visibility to feel informed without enough detail to micromanage.
What is pull planning and is it worth using?
Pull planning starts from the completion date and works backward. Each trade commits to what they need and when they need the previous trade to be done. It works best on commercial projects with many subcontractors who need tight coordination. For residential work, it is usually overkill, but the core principle of starting from the deadline and working backward is valuable for any project.
How do I recover a schedule that has already fallen behind?
First, identify which tasks are on the critical path and focus recovery efforts there. Options include overlapping trades that normally run sequentially, adding crew members to critical tasks, or working extended hours on bottleneck activities. Communicate the revised timeline to the client immediately. Do not try to silently recover because if it does not work, you have lost both time and trust.
Keep the schedule tied to the number.
SimplyWise Cost Estimator turns a job photo into an itemized estimate in about 6 seconds. Use it as your baseline when schedules shift, scopes change, or clients need a fast update. Free to try with a 7-day free trial.